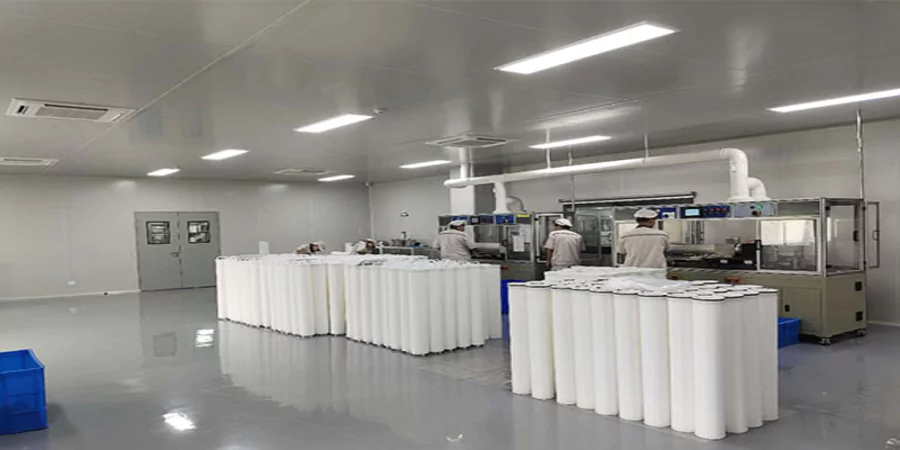
Computer Numerical Control (CNC) machining represents the backbone of modern manufacturing, producing everything from aerospace components requiring micron-level tolerances to high-volume consumer products. Yet according to the US Bureau of Labor Statistics, the metalworking machinery sector experienced approximately 2,400 non-fatal occupational injuries in 2023, with many attributed to improper machine operation, inadequate training, or failure to follow established safety protocols. For new CNC operators entering machine shops, manufacturing facilities, or prototyping labs, the gap between theoretical knowledge and practical competency can feel overwhelming CNC machines combine precision mechanics, complex programming, rotating cutters capable of removing metal at extraordinary rates, and control systems requiring systematic understanding. This comprehensive guide examines six fundamental principles for <strong>operating a CNC machine</strong> safely and effectively, drawing from OSHA safety standards, National Institute for Metalworking Skills (NIMS) competency frameworks, and insights from experienced machinists who have collectively operated CNC equipment for decades. Whether you’re beginning formal machining apprenticeship, transitioning from manual machining, or operating CNC equipment as part of broader manufacturing responsibilities, mastering these foundational concepts establishes the baseline competency necessary for productive, safe, and confident CNC machine operation.
Understanding CNC Machining Fundamentals
What Is CNC Machining and How Does It Work
Before examining operational tips, new operators must understand CNC machining’s fundamental principles:
CNC Definition: Computer Numerical Control automated control of machining tools (mills, lathes, routers, grinders) via computer programs encoding geometric data. Unlike manual machining where operators directly control tool movement through handwheels and levers, CNC machines execute pre-programmed instructions.
Major CNC Machine Types:
CNC Milling Machines:
- Vertical Machining Centers (VMC): Spindle oriented vertically, most common configuration
- Horizontal Machining Centers (HMC): Spindle horizontal, advantageous for heavy parts and multi-side machining
- 5-Axis Mills: Simultaneous control of X, Y, Z linear axes plus two rotational axes, enabling complex geometries
CNC Turning Centers (Lathes):
- 2-Axis Lathes: Control spindle rotation and tool position in two axes
- Multi-Axis Lathes: Additional live tooling, sub-spindles, Y-axis milling capability
Specialized CNC Equipment:
- Swiss-Type Lathes: For high-precision small parts
- Wire EDM: Electrical discharge machining for hardened materials
- Waterjet/Laser Cutters: Non-traditional machining methods
Control Systems: Major CNC control manufacturers include:
- Fanuc: Japanese manufacturer, extremely common in industrial settings
- Haas: American manufacturer, popular in job shops and education
- Siemens: German controls, prevalent in European machinery
- Mazak: Integrated with Mazak machines (Mazatrol conversational programming)
- Heidenhain: High-end European controls
Each control has unique interface, programming syntax, and operational characteristics skills developed on one control transfer imperfectly to others.
The CNC Workflow
Step 1: Design (CAD)
- Computer-Aided Design software (SolidWorks, Fusion 360, Mastercam)
- Creates 3D model with precise dimensions and tolerances
Step 2: Programming (CAM)
- Computer-Aided Manufacturing software converts 3D model to toolpaths
- Generates G-code and M-code (machine instruction language)
- Simulates machining to verify code before metal cutting
Step 3: Setup
- Install workholding (vise, fixture, chuck)
- Load tools into machine
- Establish work coordinate systems
- Load program into control
Step 4: Prove-Out
- Dry run (machine executes program without cutting)
- First article inspection
- Adjust offsets and parameters as needed
Step 5: Production
- Machine executes program repeatedly
- Operator monitors process, changes tools, inspects parts
- Documents dimensions and maintains quality records
Understanding this workflow contextualizes where operational skills fit within broader manufacturing process.
Tip 1 – Master Machine Components and Control Functions
Essential Machine Components
Structural Elements:
Machine Bed/Base:
- Heavy cast iron construction providing rigidity
- Absorbs vibration during cutting
- Houses ways (precision rails) for axis movement
Spindle:
- Rotating component holding cutting tools
- RPM range: Typically 50-12,000+ RPM depending on machine size
- Taper type: CAT, BT, HSK (determines tool holder compatibility)
- Power rating: 7.5-40+ horsepower for typical VMCs
Axis Drives:
- X-Axis: Left-right table movement (typical travel: 20-40 inches)
- Y-Axis: Front-back table movement (typical travel: 16-28 inches)
- Z-Axis: Up-down spindle movement (typical travel: 20-30 inches)
- Ballscrews or linear motors provide precise positioning
- Accuracy: ±0.0001-0.0005 inches typical
Tool Changer:
- Automatic Tool Changer (ATC): Robotic arm swapping tools from magazine
- Tool capacity: 20-40 tools typical, up to 200+ for advanced machines
- Change time: 2-8 seconds depending on system
Coolant System:
- Through-spindle or flood coolant delivery
- Chip evacuation and temperature control
- Coolant types: Water-soluble, straight oil, synthetic
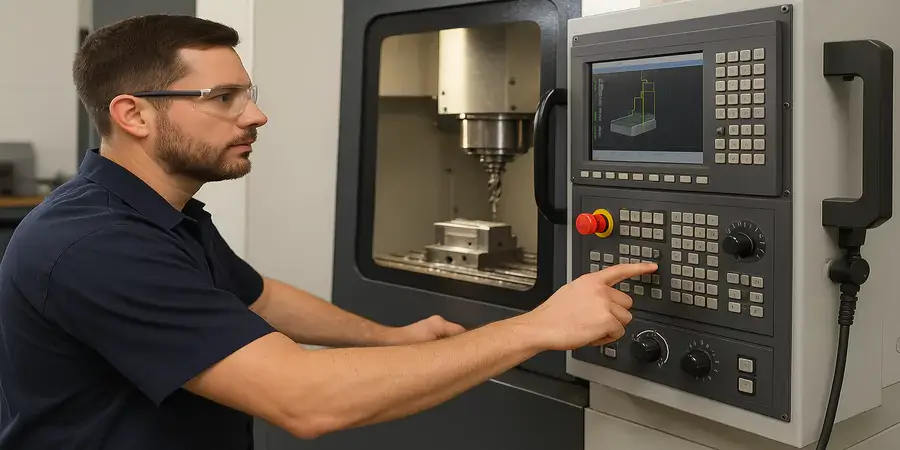
Control Panel Navigation
Mode Selection: Modern CNC controls operate in distinct modes:
Edit Mode:
- Create or modify programs directly at control
- Not used during cutting operations
- Requires password protection on production machines
Memory/Auto Mode:
- Execute programs stored in control memory
- Standard production mode
- Operator can adjust feedrate override, spindle speed override
Manual Data Input (MDI):
- Execute single blocks of code without full program
- Useful for setup, tool touching, jogging to positions
Jog Mode:
- Manually move machine axes
- Jog rates: Rapid, medium, slow (typically 0.1, 1.0, 10 inches/minute, rapid)
- Used for setup, tool changes, positioning
Handle/Handwheel Mode:
- Fine control via electronic handwheel
- Incremental movement (0.0001, 0.001, 0.01, 0.1 inch increments)
- Precision positioning during setup
Key Control Functions:
Cycle Start:
- Green button initiating program execution
- Machine will not move until pressed (safety feature)
Feed Hold:
- Yellow button pausing program execution
- Machine maintains position, spindle continues rotating
- Resume with Cycle Start
Emergency Stop:
- Red mushroom button
- Immediately halts all motion, stops spindle
- Requires reset procedure to restore operation
- Critical: Know E-stop location before operating any machine
Override Controls:
- Feedrate Override: 0-200% typical range, adjust programmed feedrates
- Spindle Speed Override: 50-120% typical range, fine-tune RPM
- Rapid Override: 25-100%, slow rapid moves during prove-out
Understanding Coordinate Systems
Machine Coordinate System (MCS):
- Fixed reference based on machine’s home position
- Established during machine homing sequence
- Never changes
Work Coordinate Systems (WCS):
- G54-G59: Standard work offsets (6 available on most machines)
- Operator defines origin (0,0,0) relative to workpiece
- Multiple offsets enable multiple part locations or setups
Tool Length Offsets:
- Compensate for different tool lengths
- Machine knows distance from spindle face to tool tip
- Enables tool changes without re-touching workpiece
Tool Diameter Compensation:
- G41/G42 codes compensate for tool radius
- Enables same program with different diameter tools
- Critical for maintaining dimensional accuracy
Practical Exercise for New Operators: Spend 2-4 hours with machine powered on (not cutting) practicing:
- Navigating between modes
- Jogging all axes in different increments
- Locating and testing E-stop
- Reviewing work offset tables
- Examining tool offset tables
- Understanding override functions
This hands-on familiarity builds muscle memory and confidence before introducing cutting operations.
Tip 2 – Implement Comprehensive Safety Protocols
Personal Protective Equipment (PPE)
Mandatory PPE for CNC Operations:
Eye Protection:
- Minimum: ANSI Z87.1 rated safety glasses with side shields
- Preferred: Safety glasses + face shield for operations generating significant chips
- Never acceptable: Prescription glasses alone, no eye protection
Hand Protection:
- Prohibited during machine operation: Gloves create entanglement hazard with rotating components
- Acceptable: Gloves for handling sharp parts, hot workpieces (when machine stopped)
- Cut-resistant gloves (Kevlar, Dyneema) for handling raw stock
Footwear:
- Steel-toe or composite-toe safety shoes
- Slip-resistant soles for oil-covered floors
- Covers entire foot (no sandals, open-toe shoes)
Clothing:
- Avoid: Loose clothing, dangling jewelry, neckties, loose long hair
- Acceptable: Close-fitting clothing, long pants, short sleeves or fitted long sleeves
- Long hair secured in bun or under cap
- Remove rings, watches, bracelets (entanglement and electrical hazards)
Hearing Protection:
- CNC operations typically 80-95 dB
- OSHA requires hearing protection above 85 dB for 8-hour exposure
- Earplugs or earmuffs meeting NRR 20+ rating
Machine-Specific Safety Hazards
Rotating Component Hazards:
Spindle and Tool:
- Rotating at 1,000-12,000 RPM
- Contact causes severe lacerations, amputations, entanglement
- Never: Reach into machine while spindle rotating
- Never: Measure parts, brush chips, or touch workpiece during operation
- Always: Wait for complete spindle stop before opening doors
Chip Hazards:
- Metal chips reach 400-600°F immediately after cutting
- Razor-sharp edges cause deep lacerations
- Never: Use hands to clear chips
- Always: Use brush, hook, or chip rake with machine stopped
- Never: Use compressed air (propels chips at high velocity into skin, eyes)
Coolant Hazards:
- Water-soluble coolants breed bacteria (dermatitis, respiratory issues)
- Coolant mist inhalation (occupational asthma, hypersensitivity pneumonitis)
- Slippery floors from coolant leaks
- Mitigation: Mist collectors, proper ventilation, regular coolant maintenance, barrier creams
Pinch Points:
- Tool changer arms
- Moving tables and spindles
- Automatic doors
- Always: Maintain awareness of all moving components
- Never: Place hands/body parts between moving elements
Lockout/Tagout (LOTO) Procedures
OSHA 29 CFR 1910.147 requires energy isolation during maintenance, setup, or servicing:
When LOTO Required:
- Changing cutting tools manually (if machine lacks tool probe)
- Adjusting work holding
- Clearing jams
- Cleaning inside machine
- Any activity requiring barrier door opening with hands inside
LOTO Procedure:
- Notify affected personnel
- Shut down machine (controlled stop)
- Isolate energy (disconnect electrical, pneumatic, hydraulic)
- Apply personal locks and tags to isolation points
- Verify zero energy state (attempt startup)
- Perform maintenance/setup
- Remove LOTO devices only after verifying safety
- Restore energy and test operation
Many shops use simplified procedures for routine operations (tool changes, part loading) but formal LOTO remains critical for any non-routine activity.
Emergency Response
Emergency Stop Activation: Activate E-stop immediately if:
- Unusual noises (crashing, grinding, squealing)
- Smoke or fire
- Coolant system failure during cutting
- Tool breakage
- Workpiece coming loose
- Person in danger zone
- Any situation where continued operation creates hazard
Post-Emergency Procedures:
- Assess situation before reset (don’t restart problem)
- Notify supervisor
- Document incident
- Investigate root cause
- Implement corrective action
- Restart only after verification of safety
Safety Training and Certification
Formal Training Programs:
- NIMS (National Institute for Metalworking Skills): Industry-recognized CNC certification
- OSHA 10/30 Hour: General industry safety training
- Manufacturer Training: Specific to machine brand/model
- Apprenticeship Programs: 2-4 year structured training combining classroom and hands-on
According to NIMS data, operators completing formal certification programs experience 40% fewer safety incidents and 60% fewer scrapped parts in first year compared to on-the-job-only trained operators.
Tip 3 – Establish Rigorous Tool Management and Maintenance
Cutting Tool Fundamentals
Tool Materials:
High-Speed Steel (HSS):
- Traditional tool material
- Lower cost, easy to sharpen
- Suitable for low-volume, lower-speed operations
- Temperature limit: ~1,000°F before losing hardness
Carbide:
- Harder, more heat-resistant than HSS
- 2-10x tool life vs. HSS
- Higher cost but lower cost-per-part in production
- Requires rigid setup (brittle, chips rather than deforms)
Coated Carbide:
- TiN (Titanium Nitride): Gold color, general purpose
- TiAlN (Titanium Aluminum Nitride): Higher temperature resistance
- AlTiN: Even higher temperature capability
- Coatings reduce friction, extend tool life 2-4x vs. uncoated
Ceramic and CBN:
- Extremely hard, for hardened materials
- Specialized applications (tool and die, aerospace)
- Very expensive, requires expertise
Tool Geometry:
End Mills:
- Number of flutes: 2-4 flutes common (more flutes = finer finish but more heat)
- Helix angle: 30-45° typical (affects chip evacuation)
- End types: Square, ball nose, radius corner, chamfer
- Coatings and geometries optimized for materials (aluminum, steel, stainless, titanium)
Drills:
- Twist drills, spot drills, center drills, spade drills
- Point angles: 118° general purpose, 135° for harder materials
- Through-coolant capability for deep holes
Threading Tools:
- Taps (cutting threads in holes)
- Thread mills (interpolating threads, more flexible)
- Single-point threading tools (for lathes)
Tool Inspection Protocols
Pre-Operation Inspection: Before every setup or tool change, inspect for:
Visual Defects:
- Chipped cutting edges: Even small chips cause poor finish, accelerated wear
- Built-up edge: Material welded to tool (clean or replace tool)
- Excessive wear: Visible wear land on flank (time for replacement)
- Cracks: Particularly on carbide (brittle failure risk)
Physical Checks:
- Tool holder taper clean (blow out with air, wipe with clean cloth)
- Tool secured properly in holder (set screws tight, collet undamaged)
- Tool length correct (projecting proper amount from holder)
- Coolant through-holes clear (if applicable)
Measurement Verification:
- Tool length matches offset table
- Tool diameter matches programming
- Use presetter or tool probe for verification
During-Operation Monitoring:
- Listen for changes in cutting sounds (squealing indicates problem)
- Observe chip formation (continuous chips good, powdery chips indicate dull tool)
- Watch for smoke (excessive heat from dull tool or incorrect parameters)
- Monitor surface finish (degrading finish indicates tool wear)
Tool Life Management
Factors Affecting Tool Life:
- Cutting speed: Higher speed = faster wear (exponential relationship)
- Feed rate: Affects chip thickness and load
- Depth of cut: Heavier cuts increase wear
- Material hardness: Harder materials wear tools faster
- Coolant: Proper coolant extends tool life 2-4x
- Rigidity: Chatter and deflection accelerate wear
Tool Life Tracking Methods:
Simple Tracking:
- Part count per tool
- Example: “End mill good for 500 parts, replace at 450”
Advanced Tracking:
- Tool management software
- Tracks actual cutting time per tool
- Automatic tool life warnings
- Integration with CAM systems
Predictive Monitoring:
- Vibration sensors detecting tool wear
- Power monitoring (increasing power draw indicates dullening)
- Acoustic emission sensors
- Common in high-volume production, uncommon in job shops
Tool Storage and Organization
Tool Crib Best Practices:
- Climate controlled (prevent rust)
- Organized by type, size, material
- Individual tool storage (prevent edge damage)
- RFID or barcode tracking for inventory management
- First-in-first-out rotation (prevent old tools deteriorating in storage)
Contamination Prevention:
- Store tools in protective caps or sleeves
- Keep away from coolant and chips
- Never store tools loose in drawers (edge damage)
Sharpening vs. Replacement:
- HSS tools: Often economical to sharpen (local grinding services)
- Carbide inserts: Disposable (indexable inserts have multiple edges)
- Solid carbide end mills: Sharpening viable for larger tools (>0.5″ diameter), small tools typically replaced
According to study by Cutting Tool Engineering magazine, proper tool management and inspection reduces total tooling costs by 20-35% by preventing premature replacement, avoiding catastrophic failures, and optimizing tool life.
Tip 4 – Master Program Verification and Validation
Understanding G-Code and M-Code
G-Code Basics (Geometric Functions):
Motion Commands:
- G00: Rapid positioning (non-cutting moves at maximum speed)
- G01: Linear interpolation (cutting in straight lines at programmed feed)
- G02/G03: Circular interpolation (clockwise/counterclockwise arcs)
Coordinate System:
- G54-G59: Work coordinate system selection
- G90: Absolute positioning (coordinates relative to work zero)
- G91: Incremental positioning (coordinates relative to current position)
Canned Cycles:
- G81: Drilling cycle
- G83: Peck drilling (breaks chips in deep holes)
- G73: High-speed peck drilling
M-Code Basics (Machine Functions):
- M03: Spindle on clockwise
- M04: Spindle on counterclockwise
- M05: Spindle stop
- M06: Tool change
- M08: Coolant on
- M09: Coolant off
- M30: Program end and reset
Example Simple Program:
O0001 (Program number and name)
G54 (Select work coordinate system 1)
G00 G90 G40 G49 G80 (Safety line - rapid, absolute, cancel comp/offsets)
T1 M06 (Tool 1 - 0.5" end mill)
G00 X0 Y0 (Rapid to work zero XY)
G43 H1 Z1.0 (Apply tool length offset, rapid to Z clearance)
S3000 M03 (Spindle on, 3000 RPM)
M08 (Coolant on)
G01 Z-0.25 F10.0 (Feed to depth, 10 IPM)
G01 X4.0 F15.0 (Cut 4 inches in X, 15 IPM)
G00 Z1.0 (Retract to clearance)
M05 (Spindle off)
M09 (Coolant off)
G91 G28 Z0 (Return to machine home Z)
M30 (Program end)
Pre-Execution Program Review
Desk Checking: Before loading program into machine, review line-by-line:
Verify:
- Correct work coordinate system (G54 vs. G55, etc.)
- Tool numbers match tool table
- Spindle speeds reasonable for material and tool
- Feed rates appropriate (not too fast causing tool breakage, not too slow causing rubbing)
- Depths of cut achievable (not attempting 1″ depth with 0.25″ tool)
- Coolant commands present
- Tool changes occur at safe heights
- Program ends with M30 (some controls won’t reset without it)
Common Programming Errors:
- Missing decimal points (F15 vs. F15.0 – some controls interpret differently)
- Incorrect coordinate system
- Forgetting tool length compensation (G43)
- Omitting safety line causing modal codes carrying over from previous programs
- Arc programming errors (I, J, K values incorrect)
Simulation and Prove-Out
Software Simulation: Modern CAM programs include simulation:
- 3D visualization of toolpaths
- Collision detection (tool hitting fixture, clamps, part)
- Toolpath verification
- Cycle time estimation
Control Simulation: Many CNC controls include graphics mode:
- Displays toolpath on control screen
- Shows program execution without moving machine
- Verifies program loads correctly
- Identifies gross errors
Dry Run: Execute program without cutting:
- Load program into machine
- Set Z-axis work offset 2-3 inches above actual part
- Set feedrate override to 10-25%
- Set rapid override to 25%
- Execute program, observing all motion
- Verify no collisions, correct tooling sequence, logical motion
Single Block Mode:
- Control executes one line of code per Cycle Start press
- Operator reviews each move before proceeding
- Essential for prove-out of new programs
- Time-consuming but prevents crashes
First Article Inspection: After prove-out, machine first part:
- Measure all critical dimensions
- Compare to drawing specifications
- Document measurements
- Adjust offsets if needed to bring dimensions within tolerance
- Once first article approved, proceed with production
Program Optimization
Efficiency Improvements:
- Minimize non-cutting time (rapid moves, tool changes)
- Optimize tool engagement (full-width vs. partial radial engagement affects feedrate)
- Use high-efficiency toolpaths (trochoidal milling, dynamic milling)
- Combine operations to reduce setups
Quality Improvements:
- Add chamfers/breaks to prevent burrs
- Include in-process probing for verification
- Optimize feeds and speeds based on observed performance
According to research from SME (Society of Manufacturing Engineers), proper program verification prevents 90%+ of CNC crashes, which average $5,000-$50,000 in damage costs (tooling, fixturing, machine downtime, scrapped parts).
Tip 5 – Perfect Work Holding and Setup Procedures
Work Holding Fundamentals
Common Work Holding Methods:
Machine Vise:
- Most common for CNC mills
- Fixed jaw (stationary) and movable jaw
- Capacities: 4-6 inches typical for mid-size VMCs
- Jaw types: Serrated (standard), smooth (finished surfaces), soft jaws (custom machining)
Toe Clamps:
- Bolt directly to machine table T-slots
- Flexible positioning for odd-shaped parts
- Requires step blocks, parallels for support
- Time-consuming setup but maximum flexibility
Vacuum Fixtures:
- Suction holding thin, flat parts
- No top-surface clamping interference
- Requires sealed part perimeter
- Limited holding force (unsuitable for heavy cutting)
Custom Fixtures:
- Purpose-built for specific parts
- High repeatability, fast loading
- Expensive to design and fabricate
- Justified for high-volume production
Hydraulic/Pneumatic Workholding:
- Power-operated clamping
- Consistent clamping force
- Fast, repeatable
- Common in production environments
Setup Best Practices
Part Positioning:
Parallels:
- Precision ground bars lifting part off vise bottom
- Enables machining through-part without hitting vise
- Must be clean (chips between parallel and part cause misalignment)
- Tap with soft hammer ensuring full seating
Part Alignment:
- Use edge finder, probe, or indicating to establish alignment
- Acceptable parallelism: Typically within 0.001-0.002 inches across part length
- Record indicator readings for documentation
Clamping Force:
- Sufficient to prevent movement during cutting but not so excessive to deform part
- Clamp near cutting location when possible (reduces cantilever deflection)
- Aluminum and plastic particularly susceptible to deformation
- Use multiple clamps distributing load
Workpiece Probing:
- Edge finder: Mechanical/electronic device indicating exact edge location
- Touch probe: Automatic measurement of part edges, holes, features
- Benefit: Eliminates manual indicating, faster, more repeatable
Work Coordinate System Establishment
Process:
- Load and secure workpiece
- Load edge finder or probe tool
- Jog to approximate part location
- Touch off part edges in X and Y (establish X0, Y0)
- Touch top surface of part (establish Z0)
- Record offsets in work coordinate system table (G54, etc.)
Zero Location Conventions:
- Part corner (common for rectangular parts)
- Part center (common for circular parts, molds)
- Fixture location (production with multiple parts)
Multiple Setups:
- Multi-sided machining requires multiple setups
- Datum features establish relationship between setups
- Vise stops, pins, or fixture features ensure repeatability
Clamping Verification
Pre-Cycle Checks:
- Manual push test (part should not move)
- Verify clamps clear toolpath (use simulation)
- Check clamp tightness (wrenches, not just hand-tight)
- Confirm coolant won’t wash part from fixture
During First Part:
- Watch for any workpiece movement
- Listen for unusual sounds indicating vibration/chatter
- Stop immediately if part shifts
According to NIMS standards, proper work holding setup accounts for 60% of first-part success rates more critical than programming or tooling selection for achieving dimensional accuracy.
Tip 6 – Develop Vigilant Machine Monitoring Skills
What to Monitor During Operations
Visual Monitoring:
Chip Formation:
- Ideal: Continuous, curled chips breaking naturally
- Problem indicators:
- Powdery chips (dull tool, speeds too high, feeds too low)
- Long stringy chips (feeds too high, chip breaker geometry inadequate)
- Blue/purple chips (excessive heat, coolant inadequate)
- Discontinuous chips in aluminum (built-up edge forming)
Tool Performance:
- Consistent cutting sound
- No visible vibration or deflection
- Clean cutting action
- Part surface finish maintaining quality
Coolant Flow:
- Steady stream directed at cutting zone
- No dry cutting (catastrophic tool wear)
- Coolant level adequate in reservoir
- Coolant clarity (dirty coolant reduces effectiveness)
Auditory Monitoring
Normal Operating Sounds:
- Consistent whirring of spindle
- Smooth cutting sounds
- Coolant pump operation
- Servo motor movement sounds
Warning Sounds:
- Squealing/chattering: Tool rubbing rather than cutting (dull, incorrect speed/feed)
- Grinding/crunching: Tool breakage, collision, severe problem
- Rattling: Loose workpiece, loose tool, fixture problem
- Changed pitch: Tool wear progression, parameter shift
Immediate Action Required: Press Feed Hold or E-stop if hearing unusual sounds. Investigate before resuming. Many machinists develop intuitive sense for machine sounds, detecting problems before visible indicators appear.
Parametric Monitoring
Modern CNC Controls Display:
- Spindle load: Percentage of maximum spindle power
- Typical cutting: 30-60% load
- Above 80%: Potential overload, tool wear, excessive depth
- Actual vs. Programmed Feed: Deviation indicates axis limitation, binding, crash
- Tool Life Remaining: For machines with tool life management
- Axis Position: Real-time coordinate display
Alarm Monitoring:
- Servo alarms: Axis positioning errors, following errors
- Overload alarms: Excessive cutting force
- Temperature alarms: Spindle overheating
- Coolant alarms: Low level, pressure issues
Quality Monitoring
In-Process Measurement:
- Stop machine periodically
- Measure critical dimensions
- Trend dimensions over production run
- Adjust offsets proactively before dimensions drift out-of-tolerance
Statistical Process Control (SPC):
- Record measurements on control charts
- Identify trends indicating tool wear, temperature effects, setup drift
- Implement corrective action before producing non-conforming parts
Surface Finish Evaluation:
- Visual inspection of machined surfaces
- Surface roughness measurement (profilometer) for critical applications
- Degrading finish indicates tool wear requiring replacement
Problem Response Procedures
Minor Issues (Adjustable During Operation):
Tool Wear Compensation:
- Observe dimension trending toward upper/lower limits
- Stop machine at safe point (tool clear of part)
- Adjust tool diameter or length offset
- Resume operation
- Document adjustment
Feed/Speed Optimization:
- Use override controls to fine-tune parameters
- Increase feedrate if cutting too conservatively (excessive cycle time)
- Decrease feedrate if observing excessive tool load, poor finish
- Adjust spindle speed for optimal chip formation
- Document successful parameters for future runs
Major Issues (Requiring Machine Stop):
Tool Breakage:
- Press Emergency Stop immediately
- Assess damage (broken tool pieces, part damage, fixture damage)
- Clear broken tool fragments
- Inspect spindle taper (damage from broken tool?)
- Load replacement tool
- Re-establish tool length offset
- Determine where program stopped (may need to restart from safe point)
- Resume carefully, monitoring closely
Workpiece Movement:
- Stop machine immediately (E-stop)
- Secure workpiece
- Evaluate setup (why did it move? Insufficient clamping? Fixture failure?)
- Correct root cause
- Re-establish work coordinates (part likely shifted position)
- Scrap part if dimensional integrity compromised
Collision/Crash:
- Emergency Stop (if not already activated automatically)
- Assess damage (machine components, tooling, fixtures, workpiece)
- Notify supervisor immediately
- Do NOT restart machine
- Document incident
- Investigate root cause (programming error, setup error, operator error?)
- Implement corrective action
- Require qualified technician to verify machine accuracy before resuming
End-of-Shift Procedures
Machine Shutdown:
- Complete current operation (don’t leave machine mid-cycle)
- Return spindle and axes to home position
- Remove all tooling (if shop policy requires)
- Remove workpiece and work holding
- Clean machine thoroughly (chips, coolant residue)
- Turn off coolant pump
- Power down control (proper shutdown sequence, not just main breaker)
- Wipe down machine ways with way oil (prevent rust)
Documentation:
- Record parts produced, scrap count
- Note tool changes, offset adjustments
- Document any issues encountered
- Complete shift production log
- Update tool life tracking
Housekeeping:
- Sweep floor around machine
- Dispose of chips properly (recycling bin for metal chips)
- Wipe up coolant spills (slip hazard)
- Return tools to proper storage
- Organize work area for next shift
According to National Safety Council data, operators who maintain detailed monitoring logs and follow structured shutdown procedures experience 50% fewer start-of-shift issues and 30% fewer quality problems compared to those with inconsistent practices.
Advanced Competencies for Developing CNC Operators
Material Science Fundamentals
Understanding material properties affects every machining decision:
Aluminum Alloys:
- Machinability: Excellent (highest of common metals)
- Cutting Speeds: 400-1,200 SFM (surface feet per minute)
- Challenges: Gummy, built-up edge on tools, soft (deforms under clamping)
- Tooling: Polished, sharp tools; 2-3 flute end mills; aggressive speeds
Mild Steel (1018, 1020):
- Machinability: Good
- Cutting Speeds: 80-150 SFM
- Challenges: Work hardening if rubbed
- Tooling: General purpose coatings (TiN, TiAlN)
Stainless Steel (304, 316):
- Machinability: Poor to fair
- Cutting Speeds: 50-90 SFM
- Challenges: Work hardens rapidly, gummy, high heat generation
- Tooling: Sharp tools, positive rake angles, specialized stainless geometry
Tool Steels (D2, O1, A2):
- Machinability: Fair (in annealed condition), very poor (hardened)
- Cutting Speeds: 40-80 SFM (annealed), 30-50 SFM (hardened)
- Challenges: Hardness, carbide tools required for hardened material
- Tooling: Carbide or ceramic for hardened; HSS acceptable for annealed
Titanium (Ti-6Al-4V):
- Machinability: Poor
- Cutting Speeds: 30-60 SFM
- Challenges: Extreme heat generation, work hardening, reactive with tools
- Tooling: Specialty carbide grades, copious coolant, light depths of cut
Plastics (Delrin, UHMW, Acrylic):
- Machinability: Varies widely
- Cutting Speeds: 300-800 SFM
- Challenges: Heat-sensitive (melting), chip clearing, material deflection
- Tooling: Sharp, polished tools; O-flute designs; sometimes no coolant (water-sensitive materials)
Speeds and Feeds Calculations
Surface Speed (SFM – Surface Feet per Minute): Cutting speed at tool perimeter, primary factor affecting tool life
RPM Calculation: RPM = (SFM × 3.82) / Tool Diameter (inches)
Example: 0.5″ end mill in aluminum at 600 SFM RPM = (600 × 3.82) / 0.5 = 4,584 RPM
Feed Rate: Distance tool advances into material per revolution or per minute
Chip Load: Thickness of chip each cutting edge removes
Feed Rate Calculation: Feed Rate (IPM) = RPM × Number of Flutes × Chip Load (inches per tooth)
Example: 4,584 RPM, 3 flute end mill, 0.003″ chip load Feed Rate = 4,584 × 3 × 0.003 = 41.3 IPM
Depth of Cut Considerations:
- Axial depth (how deep tool enters): Typically 0.5-2× tool diameter
- Radial depth (how much width): Full width or partial (slotting vs. side milling)
- Heavier cuts require proportionally reduced feed rates
Manufacturer Recommendations: Tool manufacturers publish starting parameters:
- Consult tool catalogs (print or online)
- Manufacturer websites often have feeds/speeds calculators
- Starting points require adjustment based on:
- Machine rigidity
- Work holding rigidity
- Tool overhang (longer = less rigid = slower)
- Part complexity
Troubleshooting Common Problems
Problem: Poor Surface Finish
Potential Causes:
- Dull tool → Replace
- Incorrect speed/feed (too fast or too slow) → Adjust parameters
- Insufficient rigidity (chatter) → Reduce overhang, increase workholding, lighter cuts
- Built-up edge → Increase speed, improve coolant, sharper tool
- Machine backlash → Requires professional service
Problem: Dimensional Inaccuracy
Potential Causes:
- Tool deflection → Reduce overhang, lighter cuts, carbide tools (stiffer than HSS)
- Thermal growth (part or machine heating) → Allow warm-up, coolant consistency
- Work holding inadequate → Improve clamping
- Incorrect offsets → Verify and correct tool offset table
- Machine positioning error → Requires calibration/service
Problem: Tool Breakage
Potential Causes:
- Feeds too high → Reduce feed rate
- Excessive depth of cut → Lighter passes
- Tool runout (tool not running true) → Check spindle taper, tool holder quality
- Incorrect tool material → Carbide more brittle than HSS (avoid interrupted cuts)
- Coolant failure → Verify coolant flow
Problem: Excessive Cycle Time
Potential Causes:
- Conservative programming → Optimize toolpaths, increase parameters where safe
- Excessive tool changes → Consolidate operations, better tool selection
- Long non-cutting moves → Optimize rapid positioning
- Poor CAM programming → Improve CAM strategy
Continuous Improvement Mindset
Documentation Practices:
- Maintain setup sheets (work offsets, tooling, fixtures, notes)
- Record successful parameters for future reference
- Photograph complex setups
- Create standard operating procedures (SOPs) for recurring jobs
Learning Resources:
- Trade publications: Modern Machine Shop, Cutting Tool Engineering, American Machinist
- Online communities: Practical Machinist forums, CNCzone, Reddit r/Machinists
- YouTube channels: NYC CNC, Titans of CNC, This Old Tony
- Manufacturer training: Haas, Mazak, DMG Mori offer free training resources
- Trade shows: IMTS, EASTEC, WESTEC (see latest technology, attend seminars)
Certification Pathways:
- NIMS Credentials: Stackable certifications from Entry-Level to Master Level
- Journeyman/Apprenticeship Programs: 4-year programs combining work and education
- Community College Programs: Associate degrees in Manufacturing Technology
- Manufacturer Certifications: Brand-specific credentials (Haas Certification, etc.)
According to NIMS data, certified CNC operators earn 15-30% more than non-certified peers with equivalent experience, and achieve supervisory positions 3-5 years faster on average.
Building Professional CNC Operator Habits
Quality Mindset
First-Time Quality Philosophy:
- Scrap is expensive (material, time, tool wear)
- Prevention cheaper than detection
- Right first time every time
- “Good enough” isn’t meet specifications or remake
Inspection Discipline:
- Verify first part thoroughly before production run
- Regular in-process checks (every 10th part, hourly, etc.)
- Final inspection of completed parts
- Honest reporting of non-conformances
Dimensional Awareness:
- Understand tolerance stack-ups
- Recognize which dimensions critical vs. non-critical
- Know when to stop and verify vs. continue
- Statistical thinking (trending toward limits signals problem)
Efficiency Habits
Time Management:
- Prepare next job while machine runs (tooling, fixtures, programming)
- Batch similar jobs to minimize setups
- Maintain organized work area (reduces search time)
- Anticipate tool changes (pre-stage replacement tools)
Minimize Downtime:
- Preventive maintenance (don’t wait for failures)
- Stock commonly used tooling (avoid waiting for deliveries)
- Quick problem-solving (troubleshoot methodically)
- Communicate issues immediately (don’t hide problems)
Continuous Flow:
- Balance workload across shifts
- Hand off jobs clearly to next shift
- Complete work to logical stopping points
- Leave machines ready to run (not mid-setup)
Communication and Teamwork
Documentation:
- Clear, complete setup sheets
- Detailed problem descriptions (not “it doesn’t work”)
- Accurate time reporting
- Honest capability assessments (don’t accept jobs beyond skill level)
Collaboration:
- Ask questions (experienced machinists appreciate curiosity)
- Share solutions (help others avoid your mistakes)
- Respect expertise (programmers, engineers, inspectors each have specialized knowledge)
- Accept feedback (criticism improves performance)
Continuous Learning:
- Each job teaches something
- Mistakes are expensive education (learn from them)
- Observe others’ techniques
- Stay current with technology (CNC evolves constantly)
Professional Ethics
Safety:
- Never compromise safety for speed or quantity
- Report hazards immediately
- Follow procedures even when inconvenient
- Don’t pressure others to cut corners
Honesty:
- Admit mistakes immediately (hiding problems makes them worse)
- Accurate time reporting
- Don’t falsify inspection records
- Don’t blame equipment/others for your errors
Reliability:
- Punctuality (machine time is expensive)
- Consistent quality
- Complete assigned work
- Follow through on commitments
Career Development in CNC Machining
Career Progression
Typical Career Path:
- CNC Operator I (Entry Level): Load/unload machines, basic monitoring, simple setups (0-2 years experience)
- CNC Operator II: Independent machine operation, routine setups, basic troubleshooting (2-5 years)
- CNC Machinist/Setup Technician: Complex setups, program editing, advanced troubleshooting (5-8 years)
- Lead Machinist: Coordinate multiple machines, train operators, process improvement (8-12 years)
- CNC Programmer: CAM programming, toolpath optimization, process planning (often parallel track requiring additional software training)
- Manufacturing Engineer: Process engineering, equipment selection, facility planning (typically requires engineering degree or extensive experience)
- Shop Manager/Production Manager: Overall production responsibility, staff management, business operations
Salary Progression (US Bureau of Labor Statistics 2024 data):
- Entry-Level CNC Operator: $35,000-$45,000
- Experienced CNC Operator: $45,000-$60,000
- CNC Machinist: $50,000-$70,000
- CNC Programmer: $55,000-$80,000
- Manufacturing Engineer: $65,000-$95,000
- Production Manager: $75,000-$110,000+
Geographic location, industry sector, and company size significantly affect compensation.
Specialization Opportunities
Industry Sectors:
- Aerospace: High-precision, exotic materials, extensive documentation requirements, good pay
- Medical Device: Extreme precision, regulatory compliance, interesting work
- Automotive: High volume, efficiency focus, repetitive work
- Job Shop: Maximum variety, lower volume, broad skill development
- Tool and Die: High skill requirement, complex work, excellent pay
- Mold Making: Specialized skills, artistic element, high value work
Technical Specializations:
- 5-Axis Machining: Complex geometries, aerospace/medical applications
- Swiss-Type Machining: Precision small parts, medical sector
- Hard Turning: Machining hardened materials (eliminating grinding operations)
- High-Speed Machining: Aerospace, thin-wall parts, specialized equipment
- Micromachining: Extremely small features, medical devices, electronics
Long-Term Viability
Automation and Job Security: Common concern: Will robots replace CNC operators?
Reality: CNC machining increasingly automated, but:
- Complex, low-volume work still requires skilled human intervention
- Setup, programming, troubleshooting remain human-intensive
- Automation creates new roles (robot programming, maintenance, system integration)
- Shortage of skilled machinists (aging workforce, insufficient new entrants)
According to Manufacturing Institute research, US manufacturing faces shortage of 2.1 million skilled workers by 2030, including substantial CNC machinist shortage. Demand exceeds supply, creating job security for competent operators.
Adaptability Requirements:
- Embrace new technology (additive manufacturing integration, IoT, AI-assisted programming)
- Continuous learning (technology evolves constantly)
- Soft skills (communication, problem-solving, teamwork increasingly valued)
- Business understanding (operators who understand cost, efficiency, quality advance faster)
Conclusion: Building CNC Competency Through Deliberate Practice
Operating CNC machines safely and effectively requires integrating multiple competency domains: technical machine knowledge, rigorous safety protocols, systematic tool management, thorough program verification, precise work holding, and vigilant process monitoring. While the six tips examined provide foundational framework, genuine mastery emerges through hundreds of hours of deliberate practice, systematic learning from both successes and failures, and continuous refinement of technique.
The progression from nervous beginner to confident CNC operator typically spans 1-2 years of daily operation. During this developmental period:
Months 1-3 (Supervised Learning):
- Master basic machine functions under close supervision
- Develop safety habits and situational awareness
- Learn standard tooling and work holding
- Execute simple programs on proven jobs
- Focus on safety, accuracy over speed
Months 4-9 (Growing Independence):
- Perform routine setups independently
- Basic troubleshooting and problem-solving
- Begin program editing and optimization
- Develop efficiency while maintaining quality
- Expand material and application knowledge
Months 10-24 (Competent Operator):
- Handle complex setups with minimal supervision
- Implement process improvements
- Train new operators
- Advanced troubleshooting and problem prevention
- Consistent quality and productivity
Beyond 2 Years (Expert Development):
- Specialization in specific applications or industries
- Programming and process engineering
- Leadership and training roles
- Continuous learning and adaptation to new technology
The CNC machining profession offers rewarding career combining technical skill, problem-solving, precision craftsmanship, and continuous learning. For individuals who approach the work with safety consciousness, quality commitment, efficiency mindset, and genuine curiosity, CNC operation provides stable, well-compensated career with advancement opportunities throughout manufacturing industries.
The six essential tips examined mastering machine components and controls, implementing comprehensive safety protocols, establishing rigorous tool management, perfecting program verification procedures, excelling at work holding and setup, and developing vigilant monitoring skills provide the foundational competencies upon which all advanced CNC expertise builds. Master these fundamentals through deliberate practice, systematic study, and humble willingness to learn from every setup, every program, and every part and you’ll establish yourself as capable, reliable, safety-conscious CNC operator prepared for long, successful manufacturing career.