Splitting a video should be simple, right? You just cut it into sections and export. But if you’ve ever noticed blurry visuals, jagged edges, or a drop in clarity after splitting a video, you know it’s not that straightforward. Maintaining video quality while splitting can be tricky, especially if you’re using the wrong tools or settings.
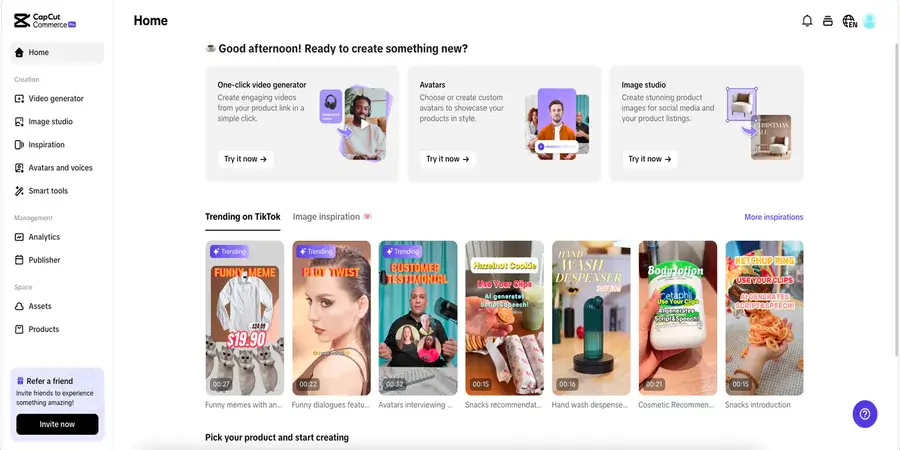
That’s where CapCut Commerce Pro comes in. Unlike basic editing tools, this professional-grade software ensures that your video remains crisp and high-quality, no matter how many times you split it. With the right approach, you can trim, cut, and divide your footage without compromising its resolution or clarity.
A common mistake many editors make is using low-quality compression settings, which can lead to pixelation and poor playback. Thankfully, here is a video splitter online URL for you that is designed for lossless processing and can help you achieve seamless edits while maintaining every detail. Let’s break down the essentials of video quality and explore the best methods to split videos without losing their sharpness.
Choosing the Right Format and Resolution
When splitting a video, the format and resolution you choose play a crucial role in maintaining quality. The wrong format can introduce pixelation, artifacts, or even compatibility issues, while an improper resolution setting may lead to unnecessary downscaling, reducing clarity.

Understanding Video Formats and Why They Matter
Different video formats have unique compression methods, and not all are ideal for preserving quality during editing. Here are some of the best formats for high-quality video splitting:
- MP4 (H.264 or H.265): The most widely used format due to its high efficiency. H.264 provides a great balance between quality and file size, while H.265 (HEVC) offers even better compression without compromising quality.
- AVI: A high-quality format with minimal compression, making it great for lossless editing. However, AVI files tend to be larger, which can be a drawback for storage.
- MOV: Commonly used in professional editing (especially on macOS), MOV files maintain high quality but can be larger than MP4.
When selecting a format, consider the intended platform. If your videos are for online use, MP4 (H.264) is the best choice as it retains quality while keeping file sizes manageable. For professional projects requiring lossless editing, formats like AVI or MOV may be preferable.
Maintaining the Right Resolution for Quality Retention
Resolution determines the number of pixels in a video. The higher the resolution, the more detailed and sharp the video appears. However, choosing the wrong resolution settings during splitting can lead to unnecessary quality loss. Here’s how to avoid it:
- Keep the Original Resolution: If you’re working with a 4K video, ensure the split sections remain in 4K rather than being downgraded to 1080p or lower. Many video splitters automatically reduce resolution to save space, so always check output settings before exporting.
- Avoid Upscaling: If a video was originally recorded in 1080p, don’t try to upscale it to 4K. This doesn’t improve quality and can introduce blurriness or noise.
- Match Platform Requirements: Different platforms have specific resolution recommendations. For instance, YouTube supports up to 8K, while Instagram Reels and TikTok work best with 1080p vertical videos (1920×1080).
Checking the Bitrate and Compression Settings
Even with the right format and resolution, compression can still impact quality. A low bitrate can make a video appear blurry, especially during fast-motion scenes. Here’s how to set optimal bitrate levels:
- 1080p Videos: Use a bitrate of at least 10 Mbps for standard quality or 15-20 Mbps for high-quality output.
- 4K Videos: A bitrate of at least 35 Mbps ensures smooth and clear visuals.
- Social Media Uploads: While some platforms compress videos automatically, setting a slightly higher bitrate can help maintain better quality after uploading.
By selecting the right format, resolution, and bitrate, you can ensure that your split videos look just as sharp and professional as the original footage.
Common Mistakes That Reduce Quality While Splitting
- Using the wrong format: Some formats like MP4 and MOV are optimized for quality retention, while others can introduce artifacts.
- Over-processing: Splitting and re-exporting a video multiple times can degrade its quality.
- Low-bitrate settings: A low bitrate may result in smaller file sizes but can significantly reduce sharpness.
- Resolution mismatch: If you split a 4K video but save it in 720p, you’re automatically losing detail.
Best Practices for High-Quality Video Splitting
Using the right video splitter is crucial, but understanding the correct settings can make all the difference. Here are some essential best practices to ensure your video remains sharp and clear after splitting:
Select a Video Splitter with Lossless Processing
Many free or basic video splitters compress your footage automatically, leading to a visible dip in quality. A professional tool like CapCut Commerce Pro offers lossless processing, meaning your video remains identical to the original even after cutting.
Adjust Bitrate, Resolution, and Format Settings
- Maintain a high bitrate: A bitrate of at least 10 Mbps for 1080p videos and 35 Mbps for 4K ensures better quality.
- Keep the original resolution: If your video is 4K, ensure it remains 4K after splitting.
- Use efficient encoding:264 and H.265 provide high-quality output while keeping file sizes manageable.
Avoid Multiple Re-Exports to Prevent Degradation
Each time you export a video, compression algorithms may degrade its quality. Instead of repeatedly exporting after each edit, make all changes in a single session and export once.
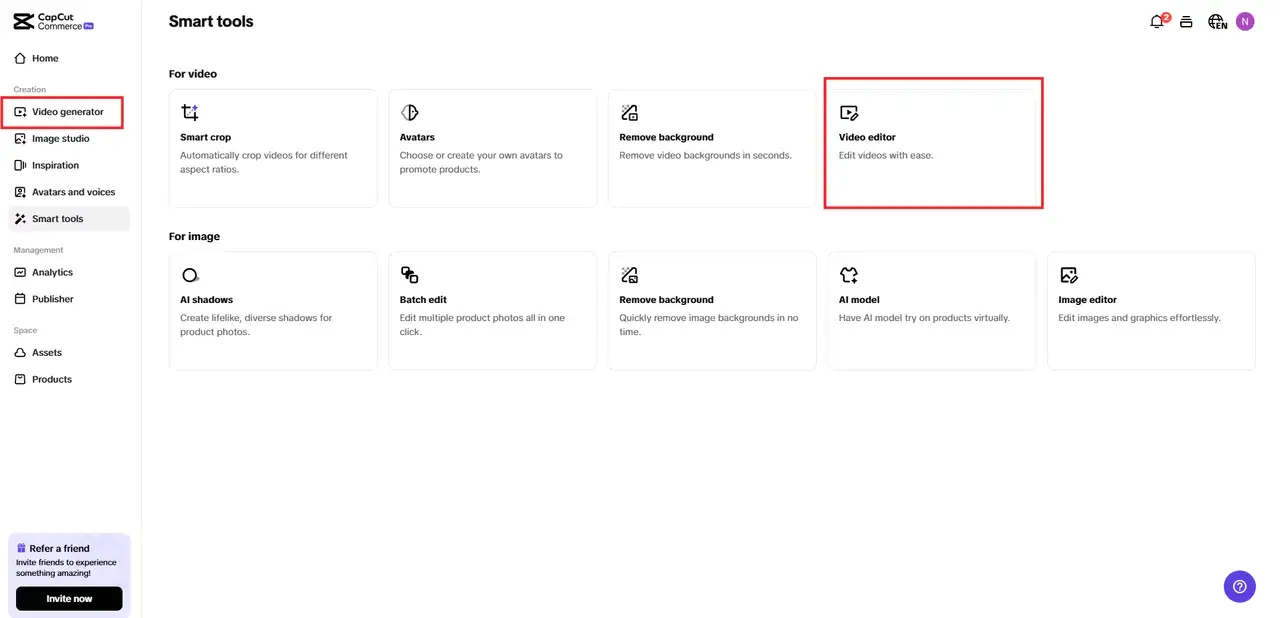
Steps to Split Videos Without Losing Quality
The key to preserving video quality is using a video splitter that prioritizes lossless editing. CapCut Commerce Pro’s advanced splitting tool ensures that each section of your video remains sharp and clear. Here’s how you can split your video without losing quality:
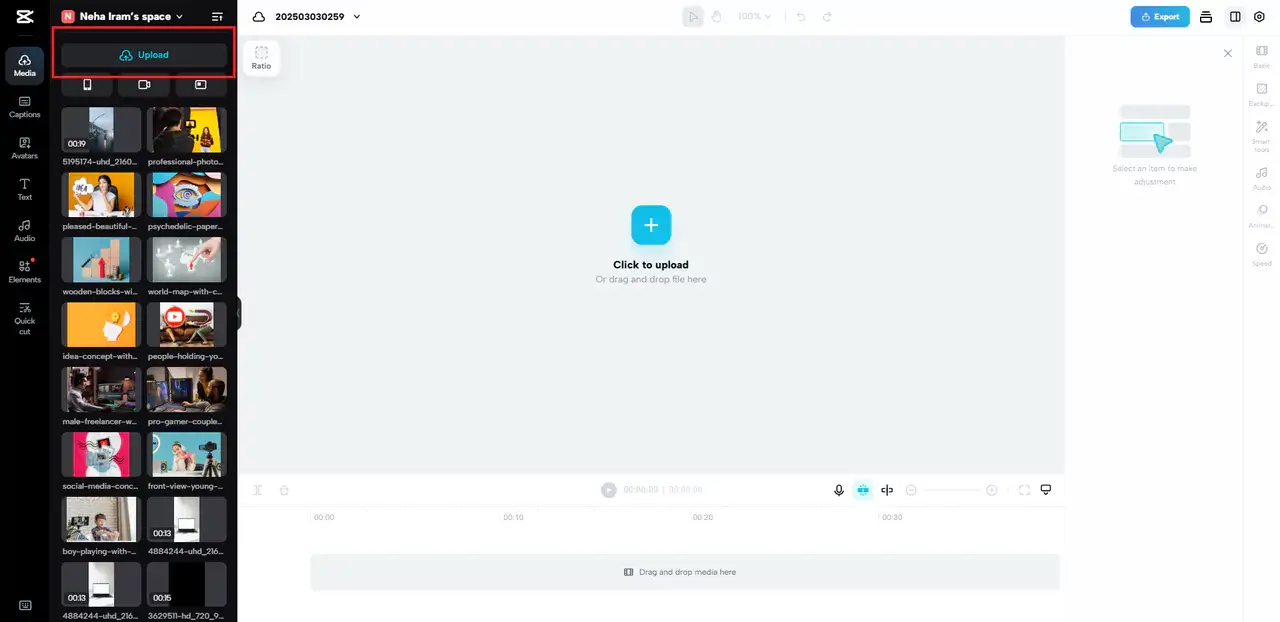
Step 1: Upload the Video in Its Highest Resolution
Start by uploading your video to CapCut Commerce Pro’s video editor. If you have a 4K or Full HD video, ensure you’re working with the highest resolution file to avoid unnecessary quality loss. Avoid converting or compressing the video before splitting.
Step 2: Use the Quick Cut to Splitte Sections
Identify the sections you want to split and use the precise cutting feature to divide them. Since CapCut Commerce Pro operates with lossless processing, the original video data remains intact even after splitting. Adjust the aspect ratio and add transitions and background effects.

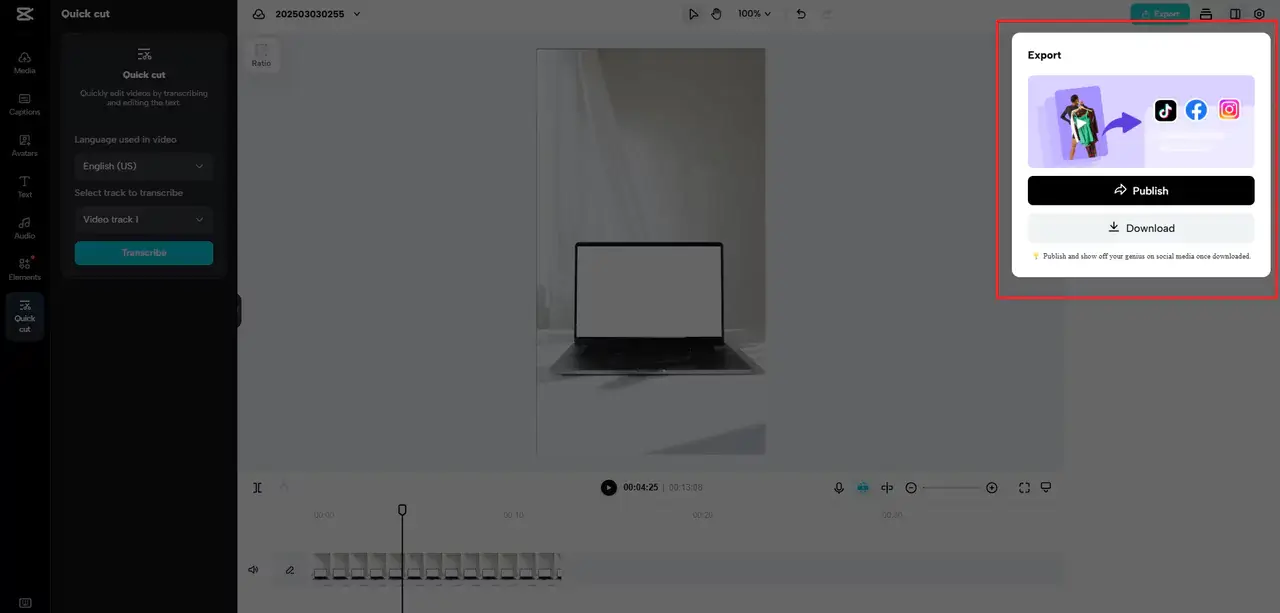
Step 3: Adjust Output Settings for Optimal Quality Before Downloading
Adjust export settings to maintain high quality and hit Publish to share it on social media directly. Once you’ve fine-tuned the settings, you can also download the split video segments without any drop in clarity.
Conclusion
Splitting a video doesn’t have to mean sacrificing quality. The right tools and settings can make all the difference, ensuring that your footage stays as crisp as the original. By using a video splitter designed for lossless processing, such as CapCut Commerce Pro, you can effortlessly cut, trim, and separate videos while maintaining their highest quality. If you’re looking for an easy way to split videos without losing quality, give CapCut Commerce Pro a try today. It’s the perfect tool for hassle-free, professional-grade video editing.